Showing posts with label big stitch. Show all posts

Sunday, January 1, 2017

Happy New Year!

Happy New Year to all!  
At the beginning of the year I always like to take a look back at my year in quilts.  It gives me a sense of accomplishment when I am also looking at my UFO list! LOL 
Now this is not a complete list of everything I worked on this year, but they are some of my favorites.  When I take the time to look back I realize that I did get a lot of quilting accomplished in 2016!
My final finish for 2016 was this mini Christmas table runner or candle mat.   I enjoyed doing the big stitch quilting on it and happy to take it off my APQ UFO Challenge 2016 list.
Do you remember this list posted last January?  This was my UFO list from the All People Quilt UFO Challenge.  As you can see I got quite a few done on this list.  It was helpful to write it down..great for commitment, and to have it hanging in my studio all year as a reminder.
Some of these finishes are in the photo collage above. YAY!
Some of the unfinished projects from the 2016 list have made it onto the 2017, and that's okay.  Here is my completed APQ UFO Challenge 2017 list.  You can join the party by clicking here.
Gracie is going to be keeping count and watching to see that I stick to the list!  I think she is saying, "Com'on Mom, I know you can do it!", or she is saying, "Seriously, all this in 2017??"
Either way, it will be fun!
 
I hope you enjoy this first day of the new year.  Good health and happiness for everyone in 2017.  Thank you so much to my blog friends and followers for all your support, kind words, and following along on my quilting journey!

Happy Stitching!

Deb


Sunday, May 17, 2015

Slow Stitching Sunday - Following My Muse

Sunday, my day to relax and stitch.  At least that is usually the plan.  Today I plan on working on this mini quilt that I made yesterday, in between doing other things around the house.... like gardening, cooking, etc. 
If  you read Julie's blog, Pink Doxies, you may have seen her post earlier this week about "She Loves You' blocks from the book Quilt Lovely by Jen Kingwell.  The block was so sweet, I knew I just had to lock to door so the Quilt Police wouldn't find me.. and make one of these blocks...or two. :-)
This was actually the second block I made.... of course when following your muse you always have to make more than just one. :-)
First attempt was good... but I didn't like the way the top of the heart looked.  Fabric selections needed to be better thought out.  You can see I am thinking of a light purple border... but not decided yet.
Third block was also good.. but my favorite is still the second one.  Which do you think works best?

Take a trip over to Pink Doxies to check out Julie's various versions of this block and what her final choice was.  I just love her fabric choices.  Thanks for the inspiration, Julie!!  These were a lot of fun and one will be a perfect gift for a girlfriend that will be moving south in the near future. 

I am linking up this Sunday at Kathy's Quilts Slow Stitching Sunday.  Stop over to see what other slow stitching is going on today.

Happy Stitching,

Deb

Sunday, September 7, 2014

Liberated Stars - Tutorial

I was on vacation this week.  Actually a staycation..  but none the less anytime at home, without the commute and headaches of work is definitely a VACATION.  So I did quite a bit of sewing (of course - duh!) and some entertaining and some general relaxing.  In fact, right now I am sitting on the deck with a bottle, I mean a glass - LOL, of wine.  My last hurrah before work and reality hits tomorrow.  It is a gorgeous late summer day here.
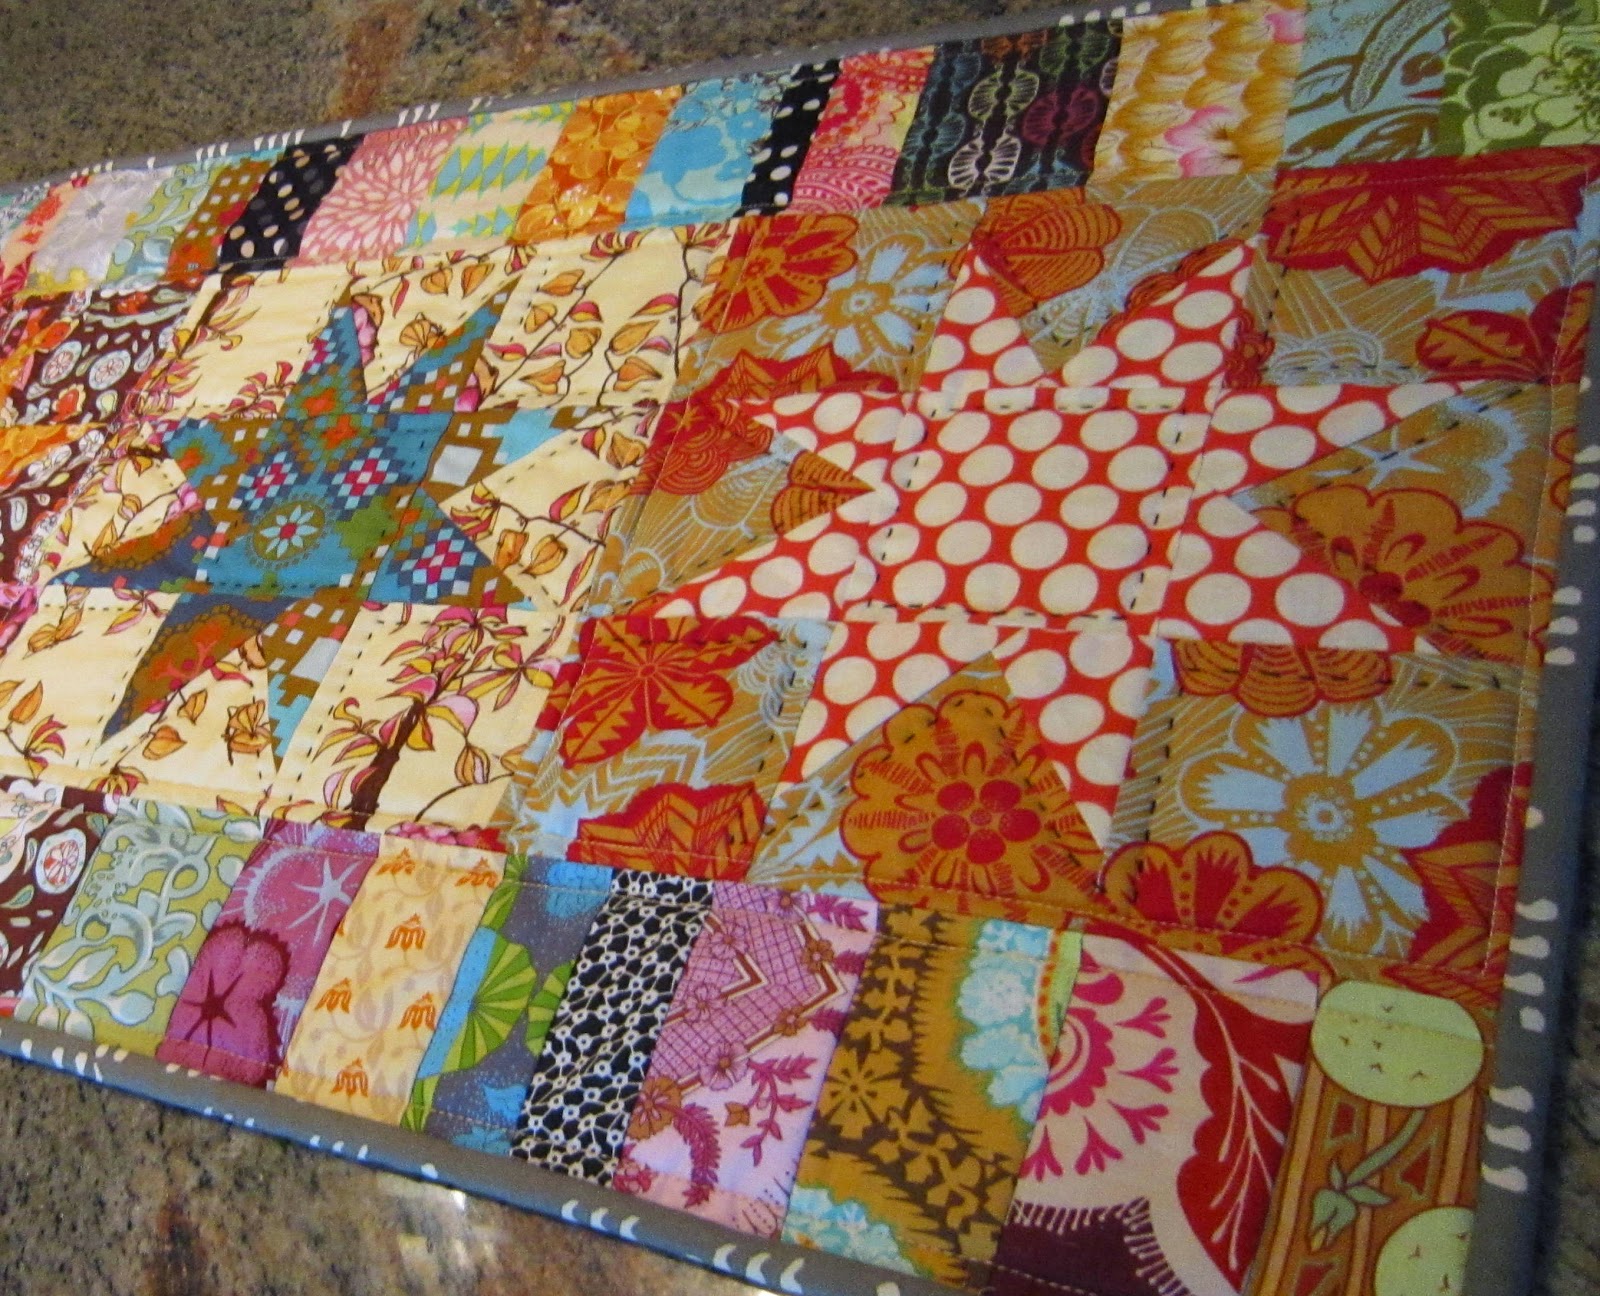
One of the projects I worked on and finished this week was a table runner from the Liberated Star blocks I have been making.  I grabbed 5 blocks, sewed them together and added a piano key type border to each of the long sides. 
 I machine quilted around each block and then big-stitch hand quilted in black cotton around each star and in the center.  I love the colors and motion that all these fabrics create when they come together.
 
A couple of people have asked about these blocks... so here we go - a quick (I hope) tutorial on how they are made.
My blocks are 9" finished.  So to start, I need to cut 8) 3 1/2" squares for my background (the blue fabric pictured here), and 4) 4" squares, cut in half to make 8 triangles (the red print fabric).  I also need  1) 3 1/2" square out of the red fabric for the star center.
Now, here is the fun and liberating part.   Put that triangle at an angle across one of the background fabric squares.  Sew with a 1/4" seam allowance from the edge of the triangle.
Trim away the excess fabric from the corner of the square.  Press the triangle toward the seam allowance.

Add the second triangle on the opposite side of the background square, again using a 1/4" seam allowance.  No matching seams, no right or wrong angle or placement.  Liberating!   I usually string piece these and do the blocks "assembly line style".
Star production line!  It goes really fast.
 

Again, trim and press.
Now I need to trim my blocks down to 3 1/2" square.
With the blocks trimmed, I can now start sewing them into rows with the other 3 1/2" square blocks that I originally cut.
The rows go together easily using a 1/4" seam allowance.  Next, I sew the rows together!
My Liberated Star block is complete!  See how the points of the star vary.
Before I know it, my star block is joined by the other star blocks I was working on!  It's a small constellation! LOL  Can you imagine how fun these would be in pastels or brights for a baby?
You can vary the size - as you can see with the 6" stars I did just for fun!
These were done with 2 1/2" background squares and 3" squares cut diagonally into triangles.
 
They are addictive!!  Right now I am up to 48 blocks!!  I think I need a quilters intervention!
 
Happy Stitching!
 
Deb

Wednesday, August 20, 2014

Design Wall Wednesday

Just a quick update on what is happening on my design wall lately.  I feel like I have really been neglecting my blog lately.
 I have been working on the Liberated Star blocks.  Some new additions to the design wall.  I am not sure when I am going to stop... I just love making these fun and colorful stars.  I currently have about 30 blocks done.  They measure 9 inches finished.
No longer on the design wall, but I did finish the table topper from 4 of these blocks.  I big stitched with black perle cotton around each star and inside the center square. 
Looks great on our coffee table.
And... a table runner for a gal at work who just bought her first house.  Her kitchen cabinets are painted that teal color, the walls are the avocado green and tan.  Nice!
And last, but not least, some funky houses on an antique cutter quilt background,
Tomorrow is our 32nd wedding anniversary.
 
Happy Anniversary, Sweetie!
 
Deb

Friday, April 18, 2014

Happy Easter and a Free Download!

I wanted to do a quick post to say Happy Easter to those of you celebrating this weekend!  Spring is finally in the air.  Even though we got snow this week - but we won't talk about that. 
14 inch pillows
I made these really cute Easter pillows a couple of years ago.  They were so much fun - I made three!  The carrot center is paper pieced from a pattern by Deb Karasik.  She has the pattern on her web site as a free download.  I have included a link below.
After completing the paper pieced carrots, I just added fabrics around the outside until I got to the desired size.  I added some machine quilting and some big stitch hand quilting and I was done.  Easy - peasey!!
16 inch pillow
I hope you enjoy your holidays and Spring!!
Lucy decided she wanted to make my Easter table topper into a comfortable bed for herself. 

Happy Easter!

Deb

Sunday, December 29, 2013

Holiday Catch Up!

Well Christmas is over and while we really enjoyed the holiday and the time away, it is always good to be back home.  I have quite a bit of blog reading to catch up on! 
It was good to have the stitching time that long rides in the car give me.  I was able to get caught up on my Sweet Hearts and finish the Candy Cane Bouquet.
Today I am getting the last few rows of Sweet Hearts sewn together and added to the quilt as we wind down to the last couple of days of the year and the last couple of Sweet Heart blocks!
The red berries are now all sewn onto the Candy Cane bouquet wall hanging and I even added a frond at the base of the urn.  I guess no one will know that the bottom of the urn was crooked.... opps.  But quilters always find a way to correct their 'challenges' in a creative way!  Now just to decide whether to hand or machine quilt this....
I think this lovely poinsettia fabric would be great on the back.
Now here is another Christmas project I made this year.. but couldn't share because it was a surprise!
This table runner is based on the quilt Pines & Presents from McCall's Quilting Nov/Dec issue.  It is machine pieced, machine quilted with some hand big-stitch quilting. 
Perfect Scissors were the perfect quilting gift from a quilting friend.  Can't wait to use these!  Hope Santa brought you some new toys!

Happy End-of-the-Year Stitching!

Deb

Sunday, October 6, 2013

Catching Up!

It's been awhile since I have posted a blog.. but that doesn't mean I haven't been busy.  Just focusing on some other things around here along with my quilting.  Quilters never have a lack of anything to do and our hands are seldom idle.  So, I won't bore you with everything that I have been up to lately, but will share the quilting highlights!
I have a friend that has a birthday this week.  Dawn is a quilter who love flamingos.  So what do you get a such a person for their birthday?  ... you make them a flamingo quilt!  This was really fun to make and even more fun to give!  I should have taken a picture of the back - it's flamingo fabric, of course!
I also have been working on this baby quilt.   I was so pleased to finish the machine quilting on this today.

Then I added the binding.  Love polka dot binding on baby quilts!
Of course someone decided to take over my chair when I was at the cutting table!
Finally, I decided to add some texture with big stitch quilting in a nice green on the brown strips. 
This will be so cute for a little one.  

Happy Stitching!

Deb

Sunday, August 11, 2013

Buzz...Buzz...Buzz.... Another UFO Flys Away!

I had an Aha Moment (a moment of sudden realization, inspiration, insight, recognition, or comprehension) a few weeks ago.  I was reading a blog where the quilter had just finished big stitching a quilt.... "easy to do..... fast.... nice result.... etc."  And then it hit me.  It was the perfect solution to a table runner I had started .... um... four years ago..??  (Yikes!)
This table runner has been pieced and basted together and set aside because I just couldn't decide how to quilt it.  You know how that goes....  The big stitch solution was perfect and I immediately pulled it from the UFO pile and grabbed the perle cotton I had on hand.  
It was fast, and it was fun!!!  And when I wasn't quilting it, Lucy thought it was the perfect hiding spot to nap.
It was done before I knew it and I added the binding.  Double fold binding that is hand stitched down on the back.  What a simple solution for this cute table runner.
The bumble bees were hand appliqued, the legs and antennas were machine buttonhole stitched.  It is based on a quilt, Honeybee, from the book Winter Rose, by Barbara Brandeburg.  After a quick wash, this will be ready to go on my kitchen island.  
However, Lucy looks disappointed that her hiding spot is gone. : - ) 

Happy Stitching!

Deb

LinkWithin

Related Posts Plugin for WordPress, Blogger...